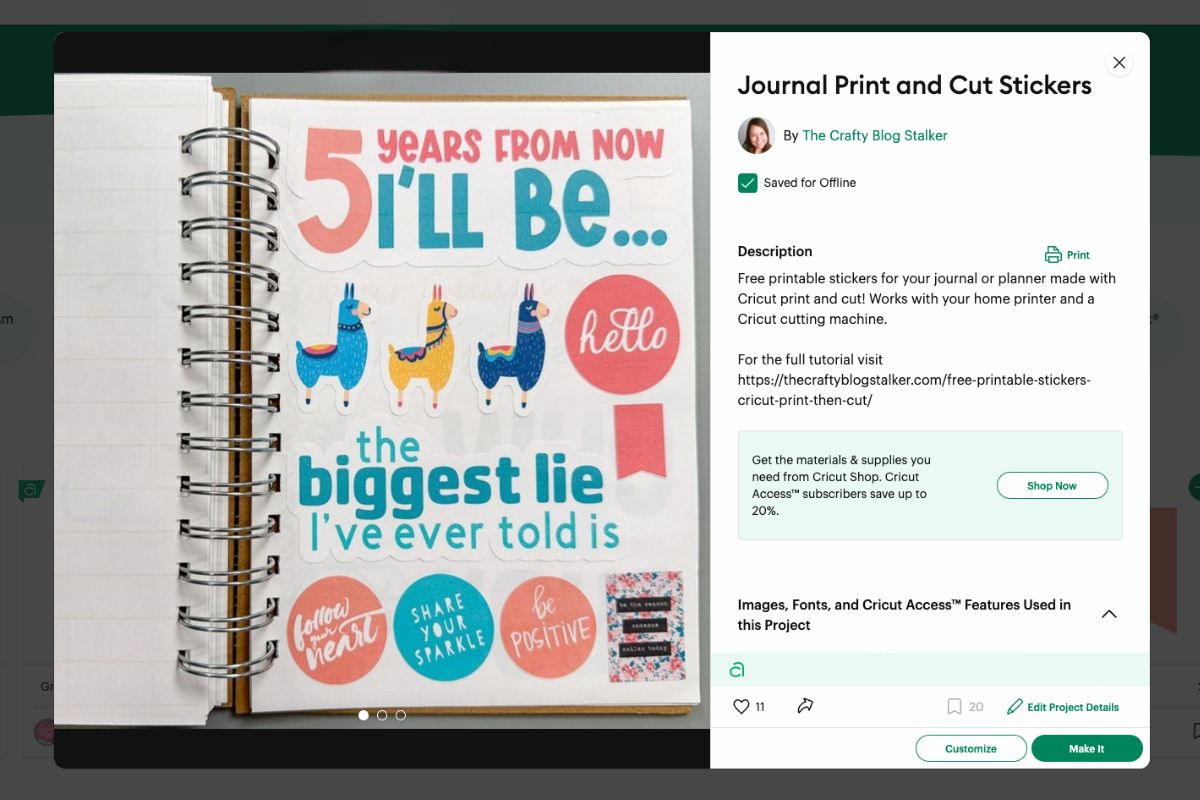
The black frame around the images is the registration guide for when you go to cut on the Cricut machine.
The machine reads those lines and knows it is cutting in the right spot.
You will have to go through the print screen for each sheet of stickers. It will not print all the sheets at once.
Now that the sheets are printed, it is time to cut them!

In Cricut Design Space select Sticker Paper.
If you don’t see it displayed, select “Browse All Materials” and find your material from that menu.
For the pressure, select “Light” if you want it to cut through only the top sticker layer, or select “More” to cut through both the sticker and liner.

Lay the printed sticker sheet into the top left corner of the Standard Grip Mat and follow the prompts on the Cricut Maker.
When the arrow light blinks, load the mat.
When the Cricut light blinks, push to begin cutting.
Once the Cricut has begun, you will see a small light underneath the blade housing.
The machine is searching for those registration marks to confirm where it should cut. It will check for the line in several places.
Then the Cricut Maker will begin cutting out your fabulous new planner stickers!

Once the first sheet is complete, remove from the mat and place the next printed sheet on the mat. Repeat until all sheets are done.


