[ad_1]
Today, I’m teaching a DIY for making a homemade advent calendar you can use year after year!
Looking for more holiday ideas? Christmas Cake Pops, Melted Snowman Cookies, Christmas Nail Ideas.
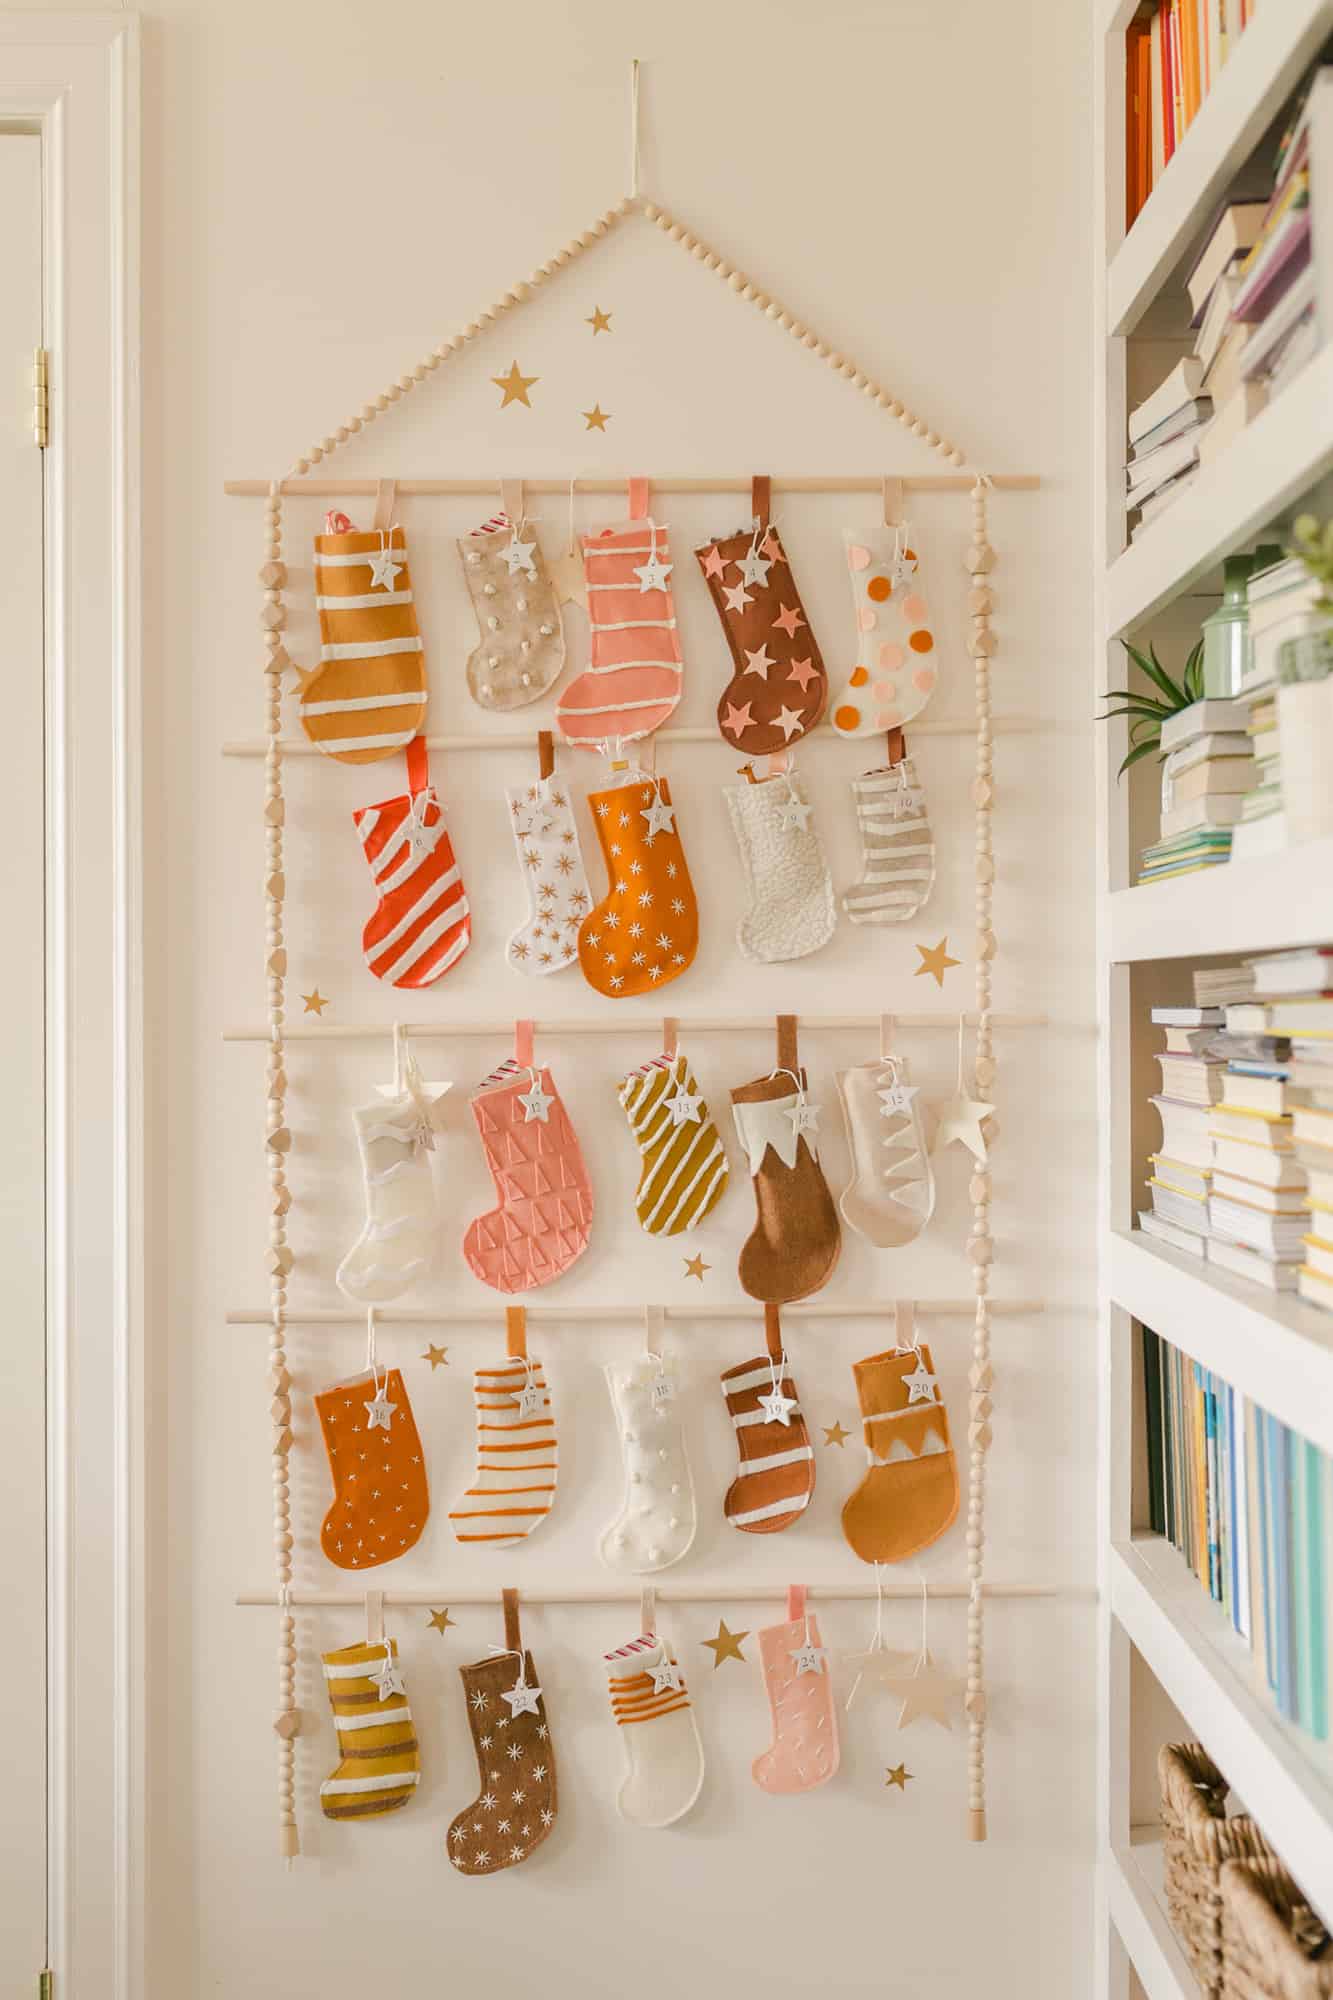
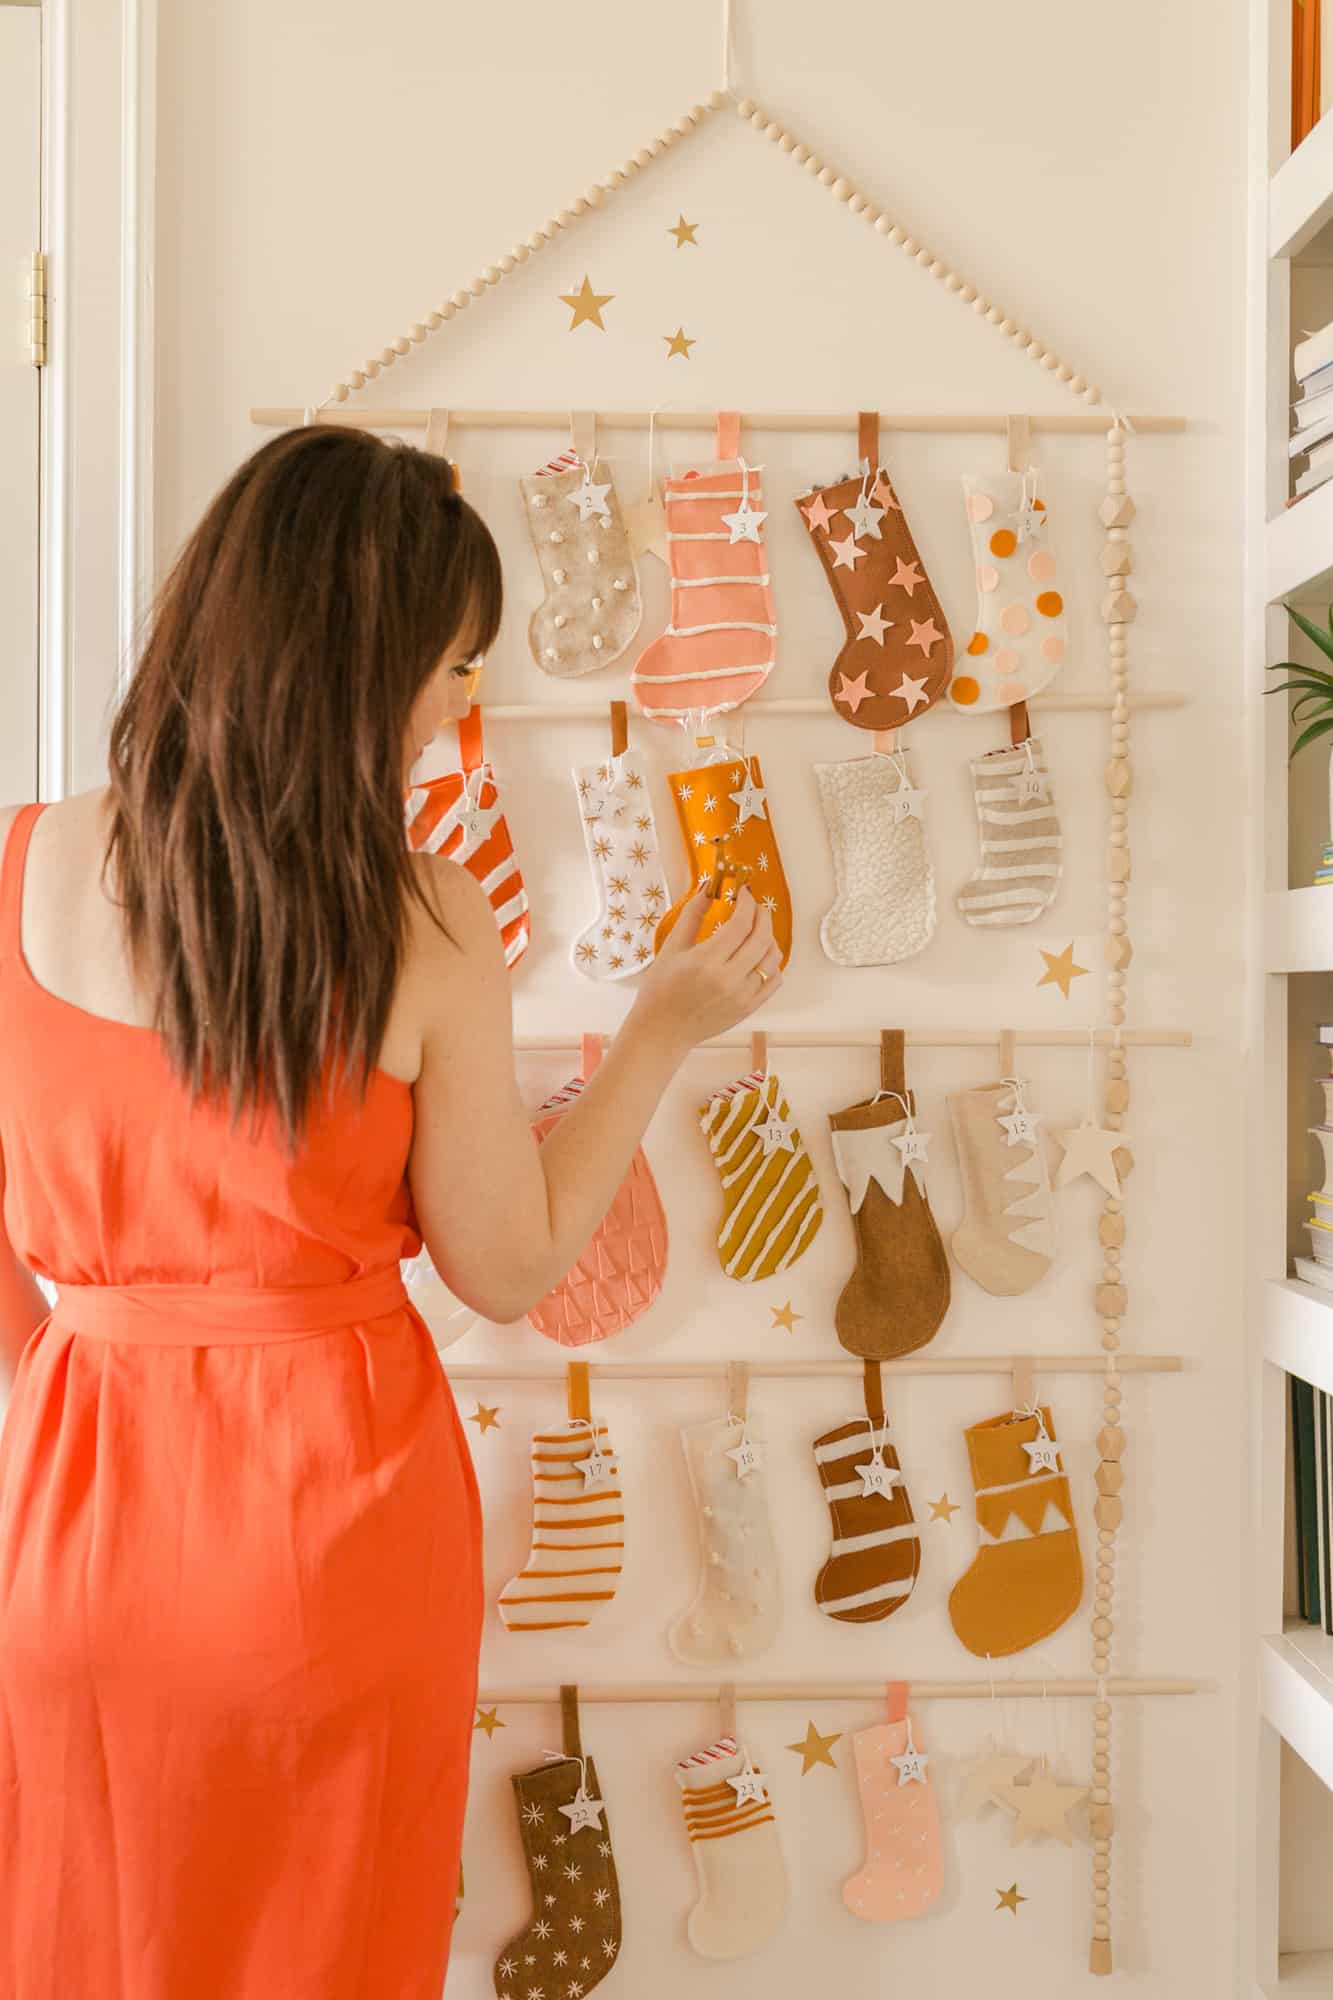
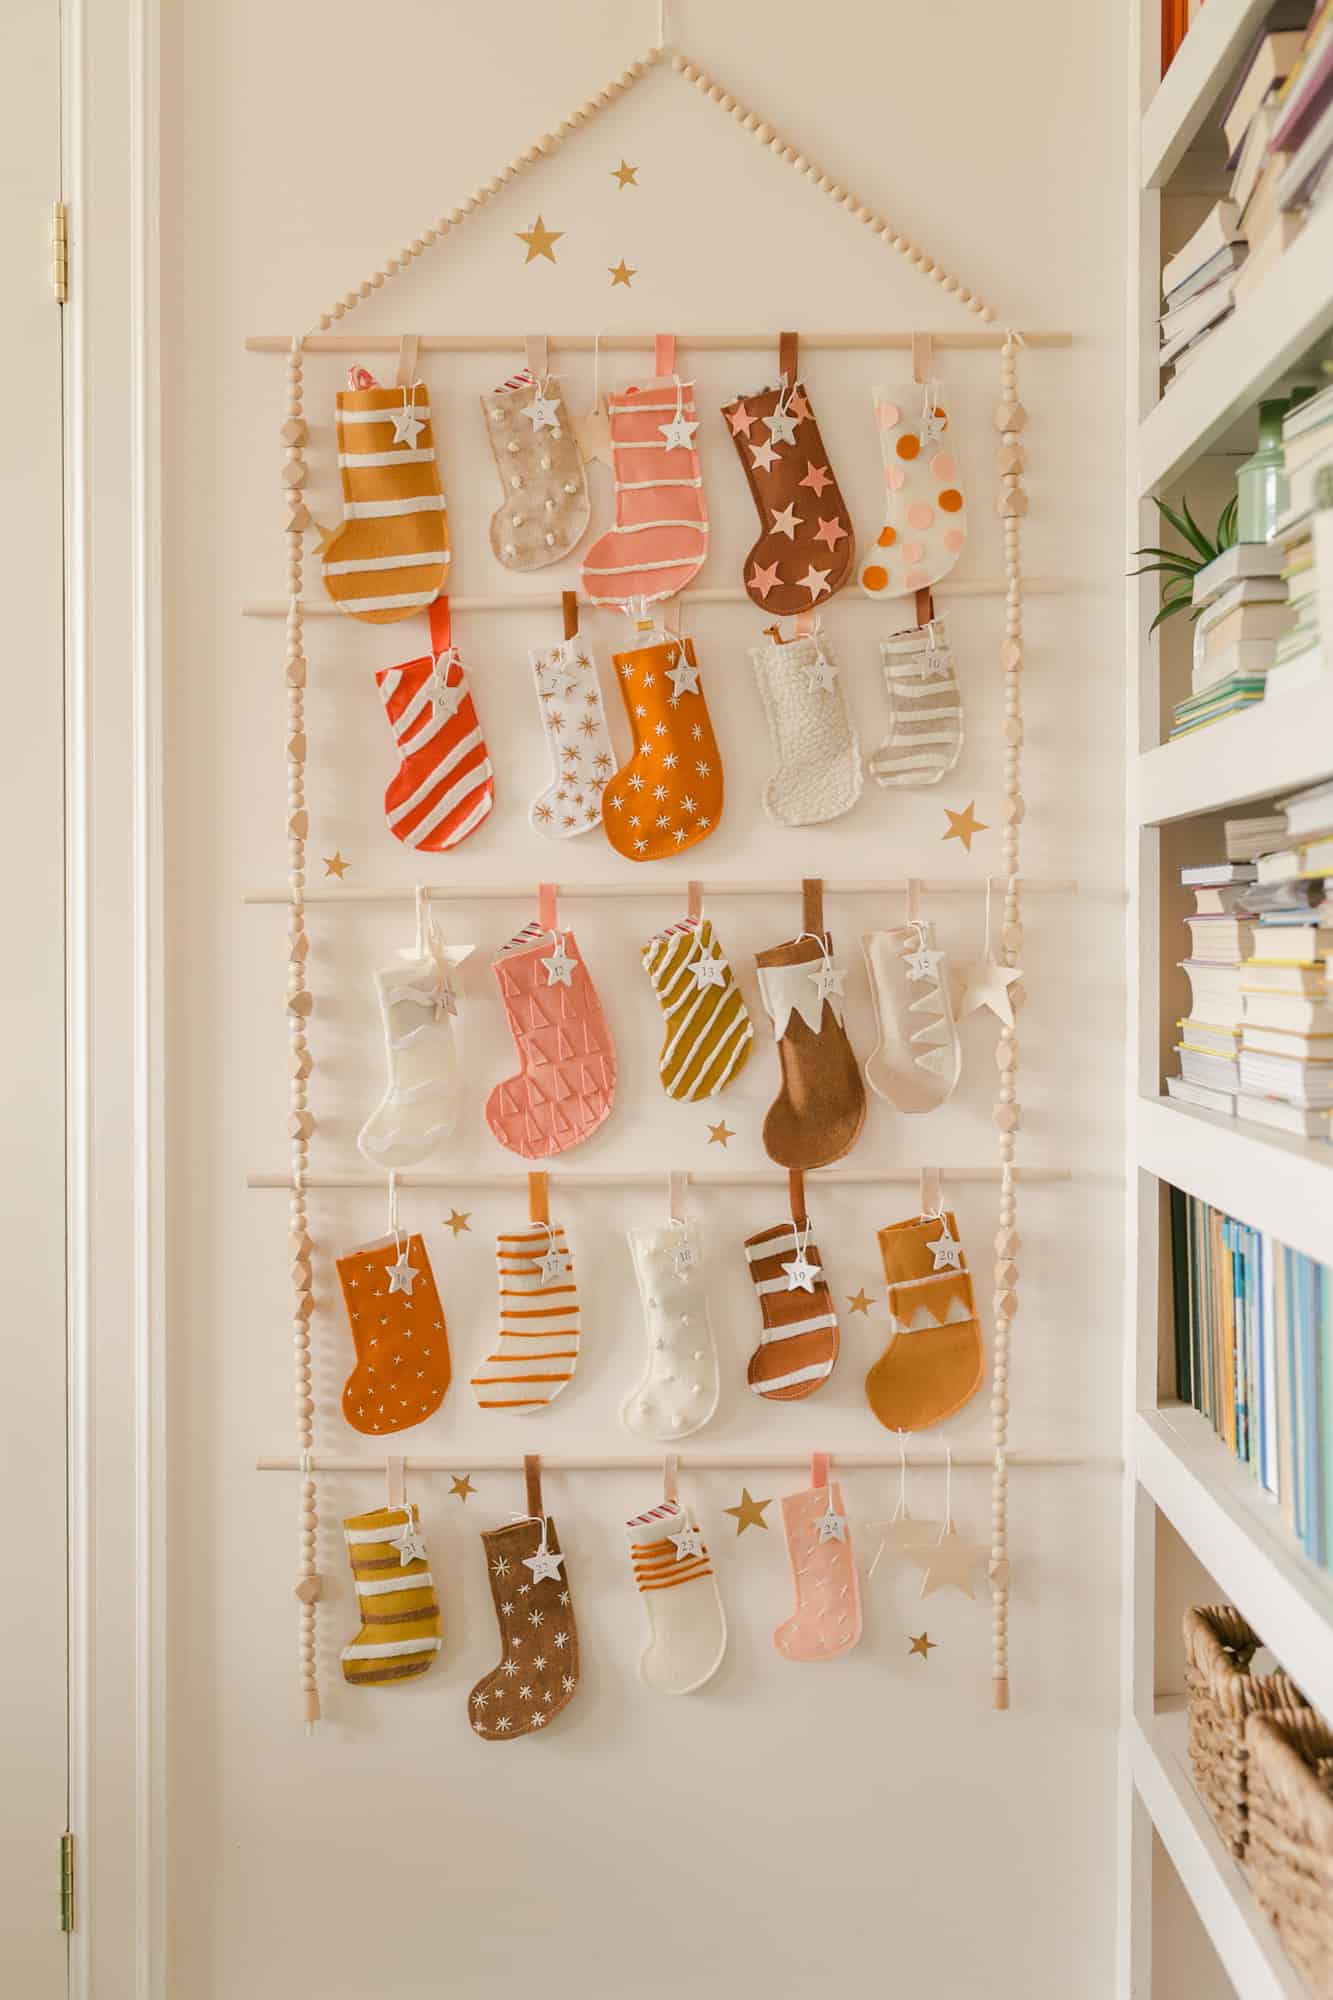
Homemade Advent Calendar
As children, we loved the tradition of an advent calendar counting down the days until Christmas. Today, I’m going to teach you how I made a reusable advent calendar for my kids.
Ideas for Advent Stuffers
Much like stocking stuffers, we like to stuff our advent with a variety of candies, small toys and trinkets and activity ideas.
Candies – For our advent, I like to get a couple bags of pre-packed holiday candies and spread them out randomly through the month. I suggest getting one bag of chocolate candies and one bag of gummy candies.
Toys and Trinkets – Try a new toothbrush, matchbox cars, Lego characters and bookmarks make great gift ideas.
Activities Print – A sheet of fun to-do items and and pack the weekends with fun activities such as watching holiday movies, driving around to see lights on people’s houses or visiting shops to buy gifts for friends and family.
It took me around a week to complete my advent calendar. If you want to save a lot of time, choose pre-made mini stockings.
Instructions
Let’s talk about the DIY steps. This is E-A-S-Y. There’s nothing in this that you can’t just see from the photos, but I will still explain all the steps just in case you’re curious about exactly how I did it.
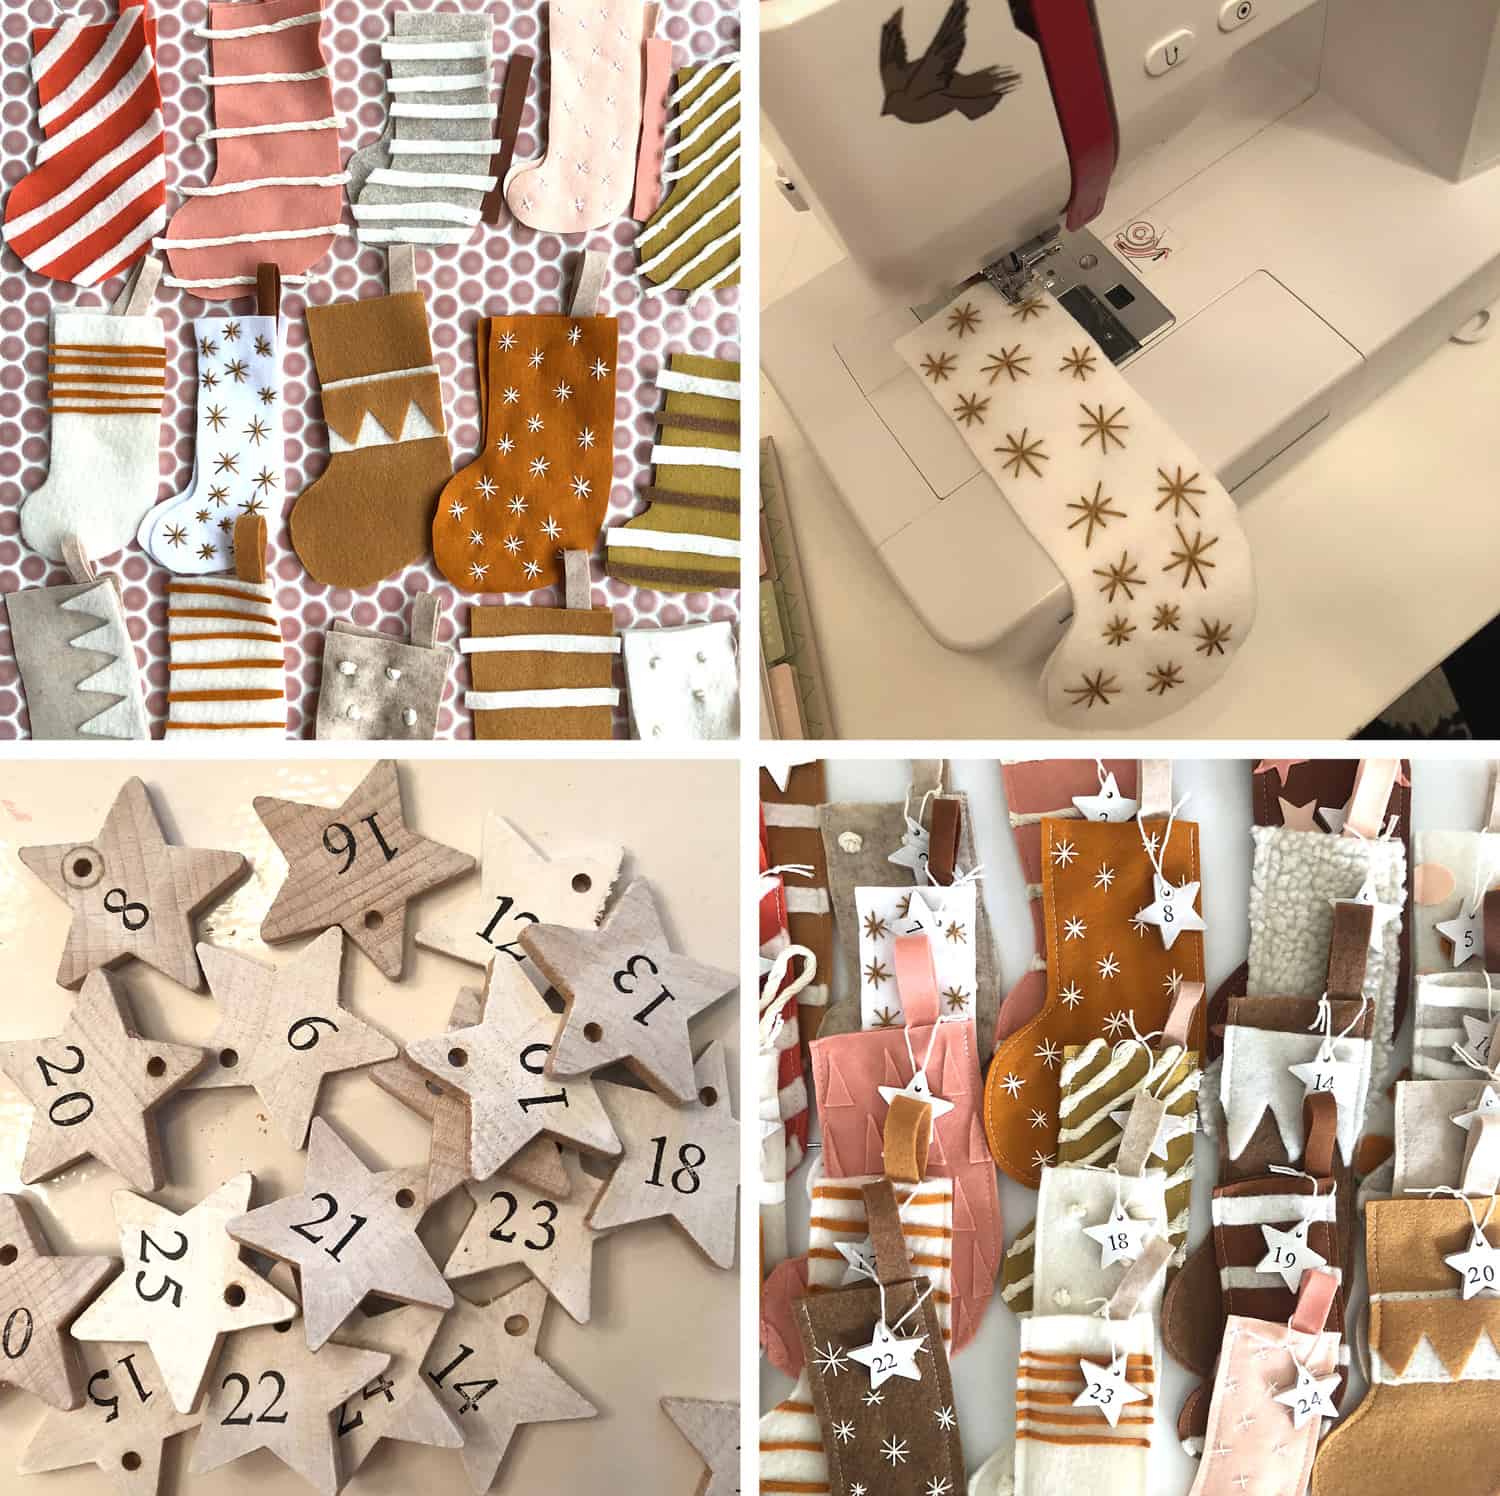
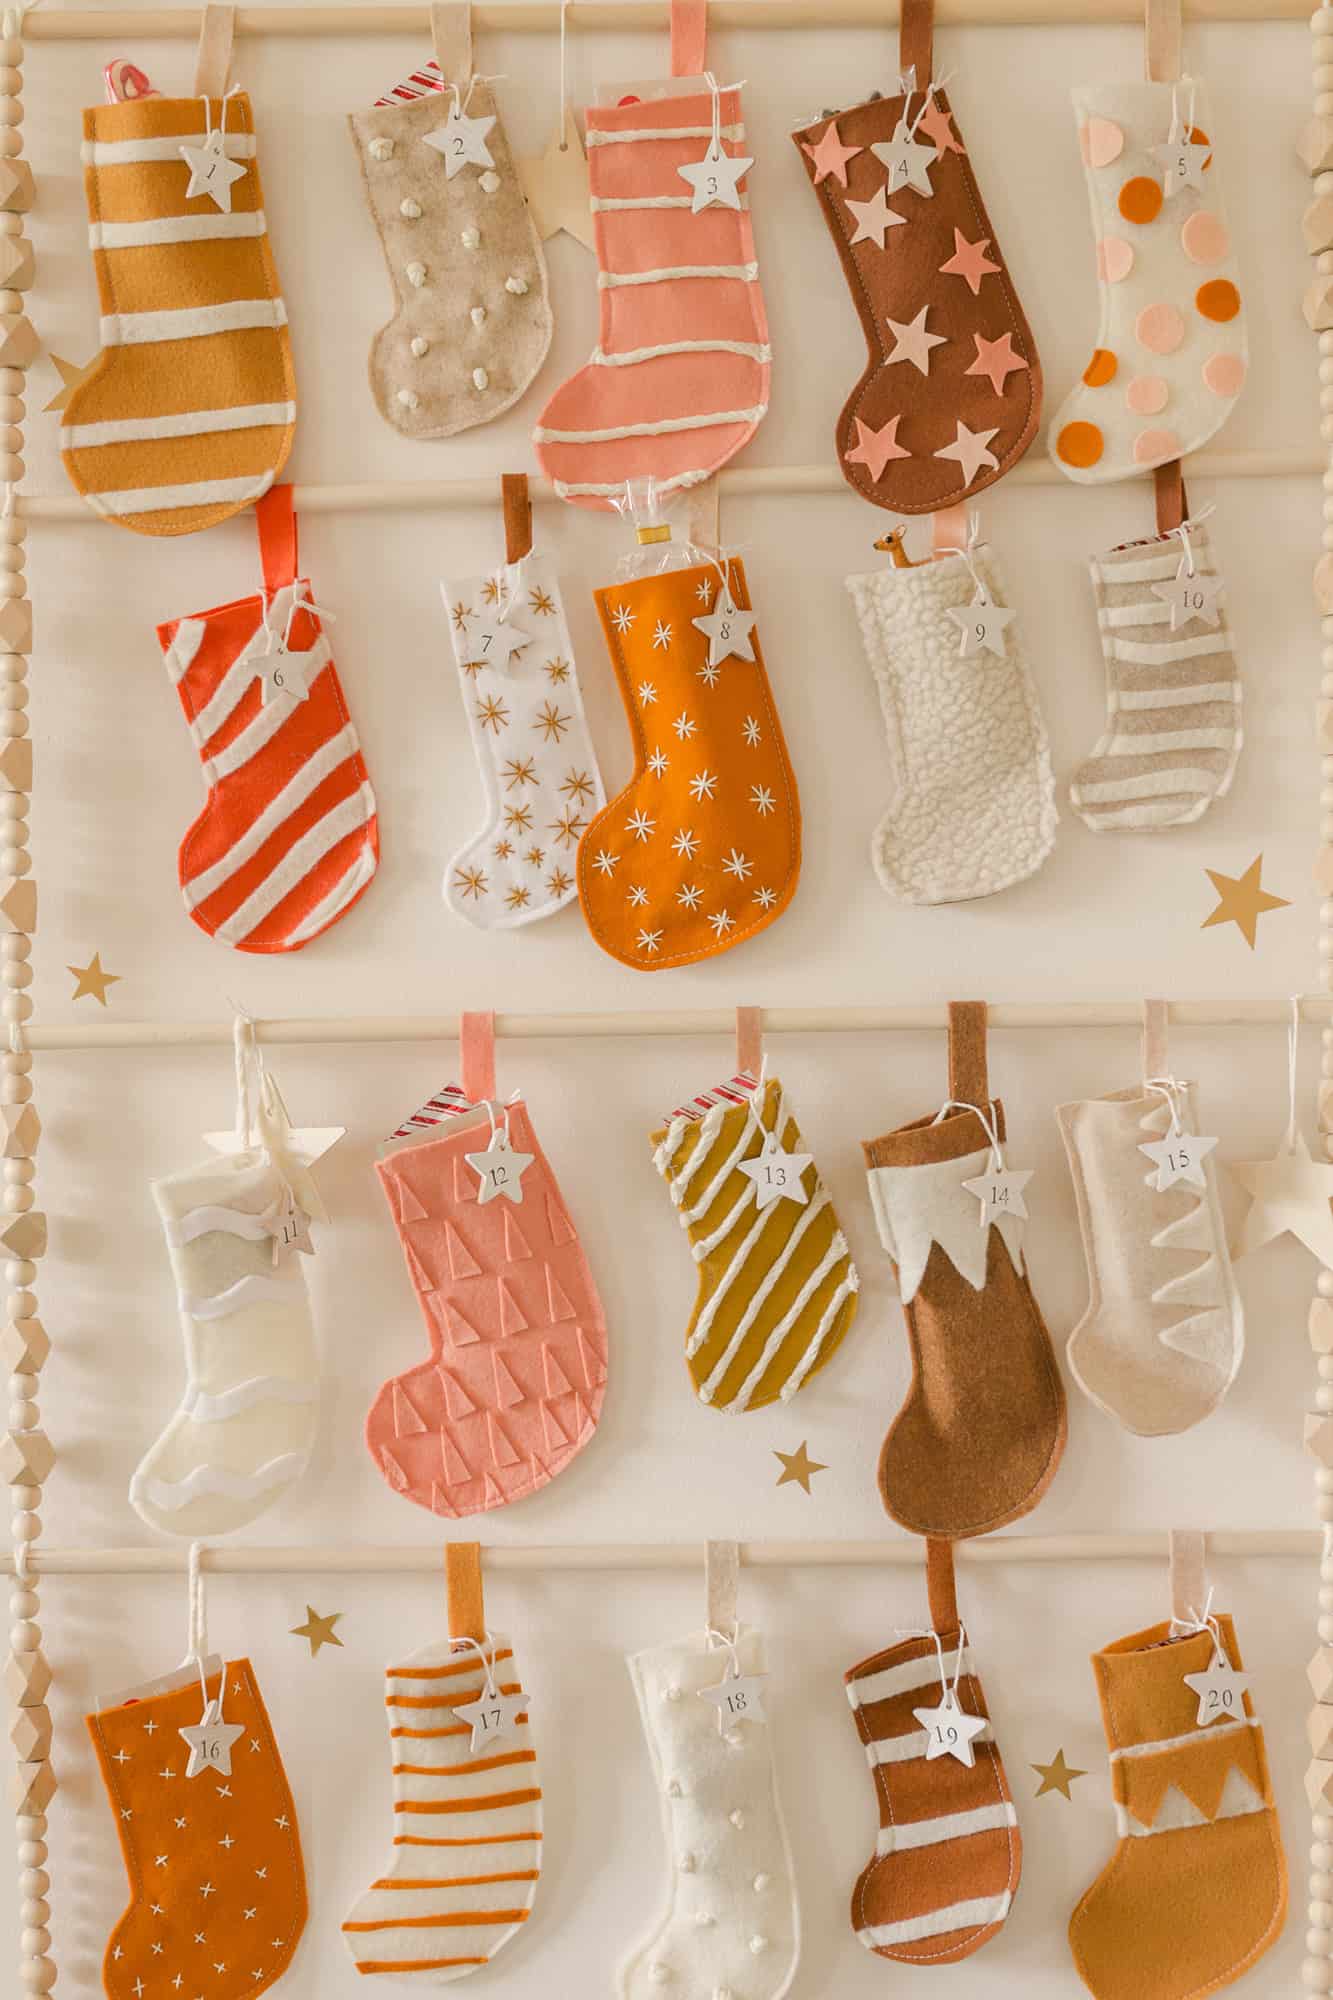
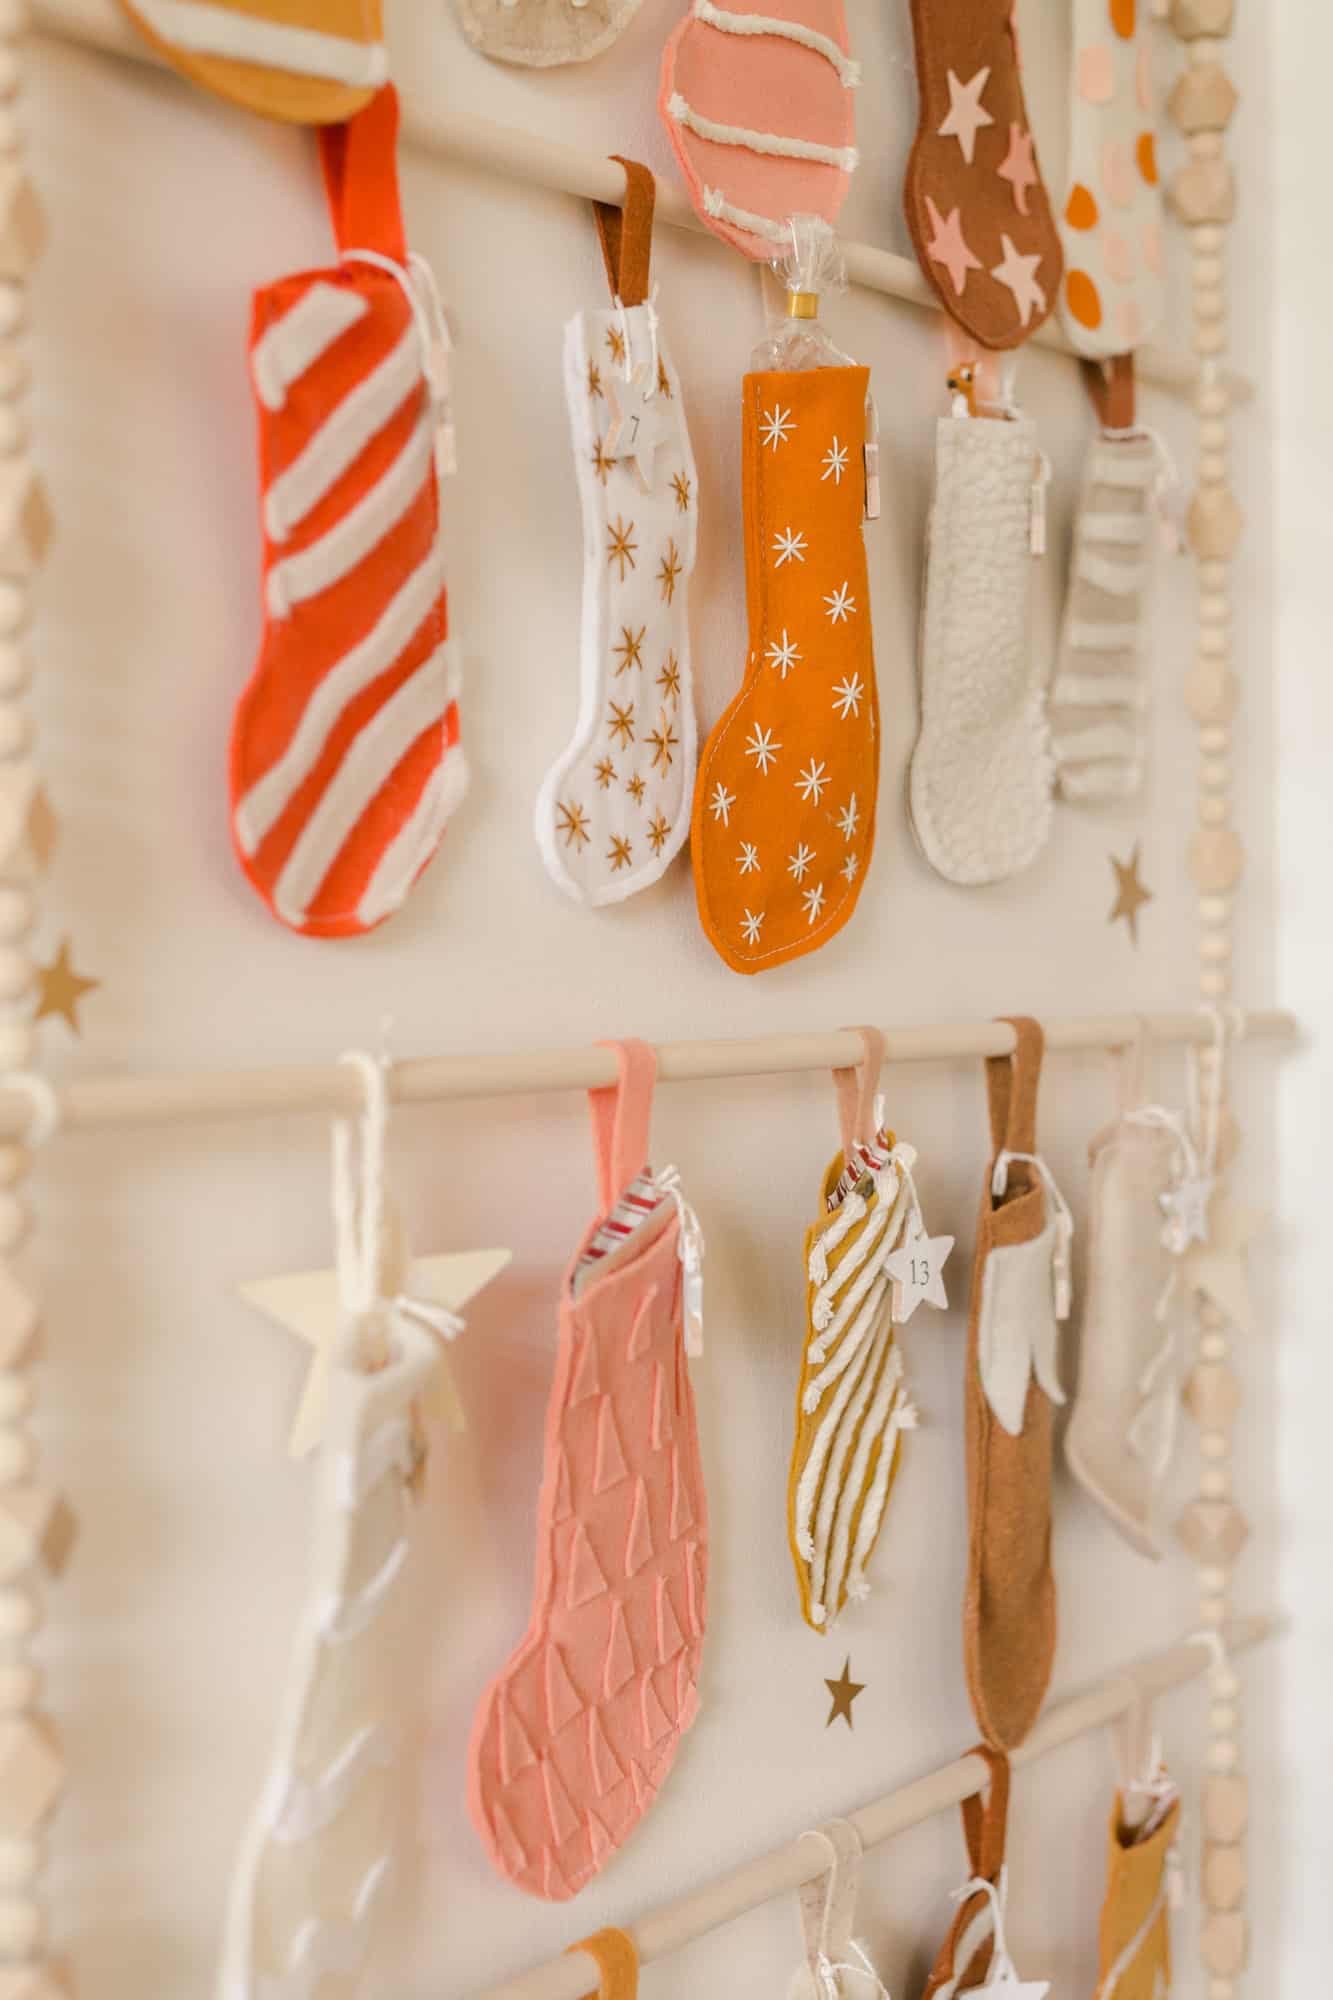
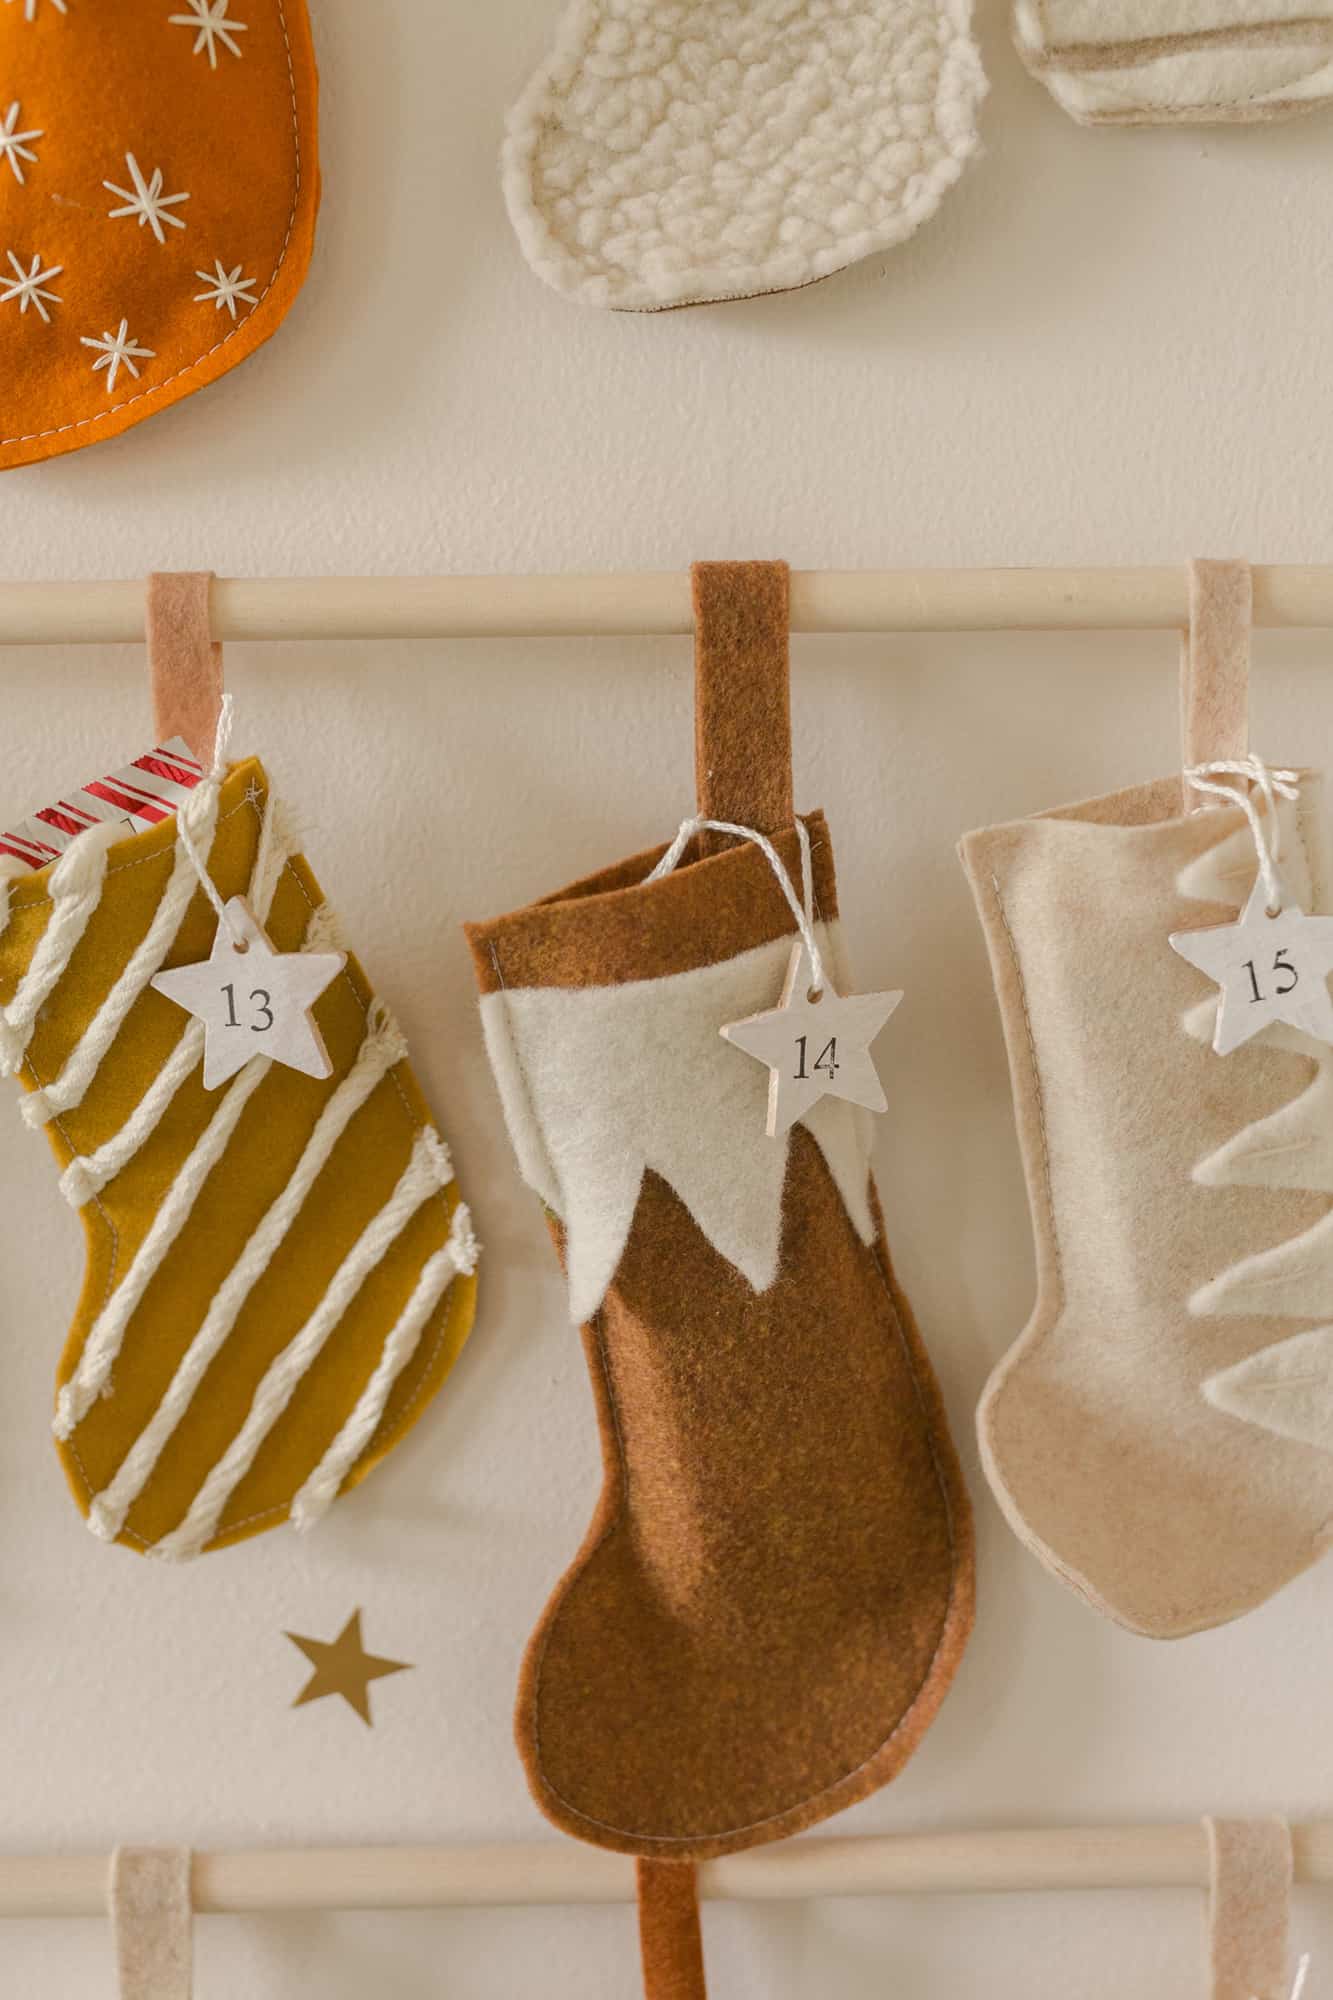
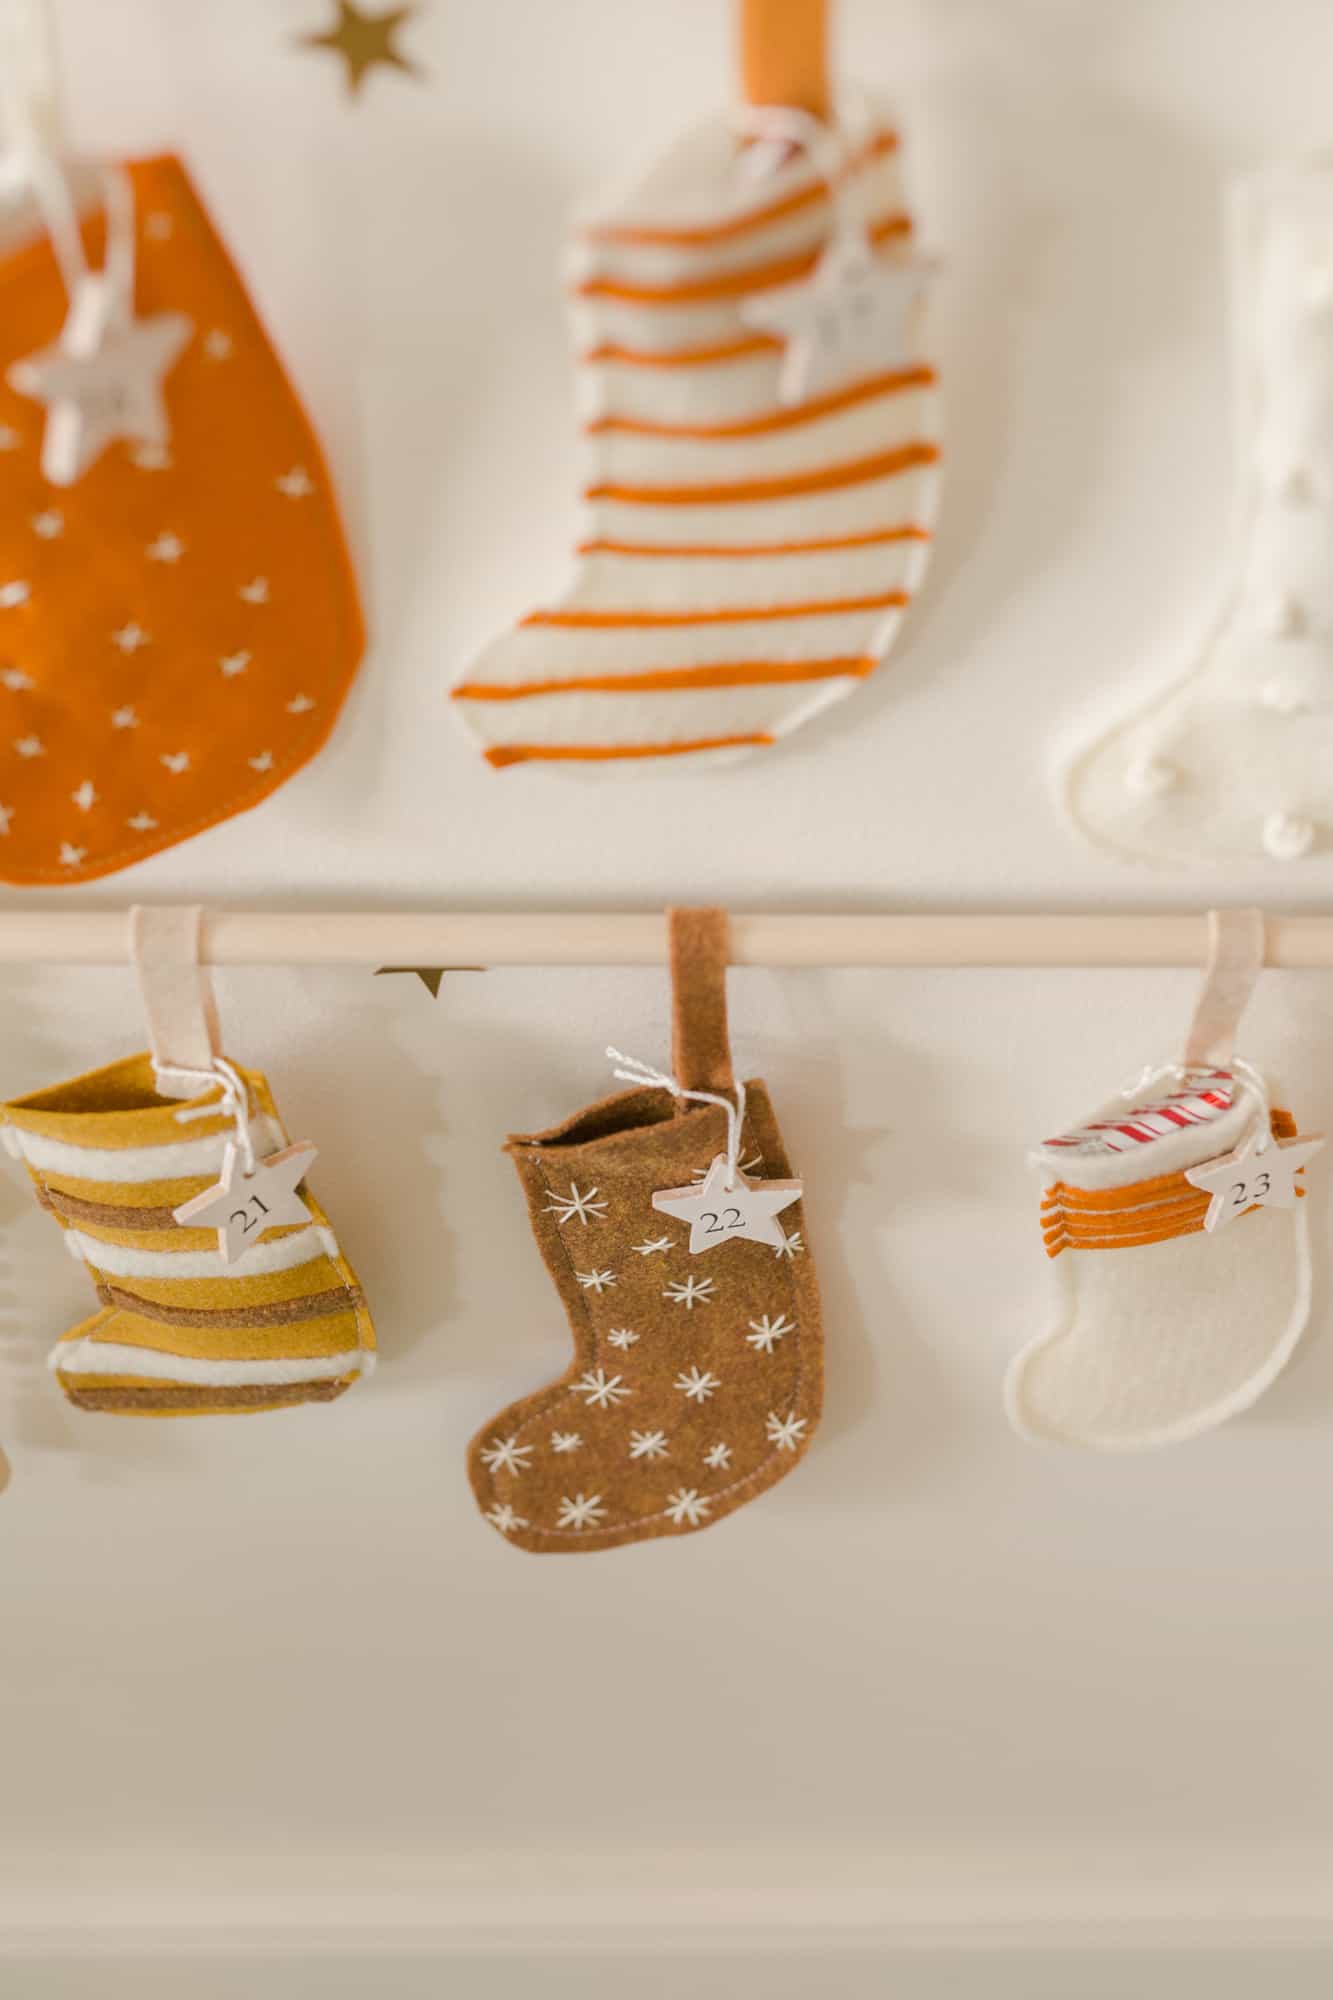
1. First, cut out 24 stockings from felt. I mainly used felt I already had, so it’s a mix between high and low quality (and I’m a-OK with that!). I made a few paper templates for stocking shapes and used them to cut out all the stockings.
I didn’t want mine to be exactly the same shapes and sizes, but you can do that if you want a more unified look. Next, embellish each stocking on the top side with hand embroidery and/or by gluing things onto the stockings.
2. Machine stitch or hand-stitch each stocking. Then, add a loop to the top of each stocking with felt or yarn (something to hang them from).
3. Paint small wood stars white and drill or punch holes. Use a stamp set to add numbers one through 24.
4. Add the stars to the stockings with string.
5. Use wooden rods, yarn, and wood beads to make the hanging structure. You can see below that my stockings are permanently attached to the rods, but you can tie them on instead if you’d like to be able to remove them each day.
Bonus step: After I was done, I wanted to add a little more detail, so I hung a bunch of larger wooden stars on the rods.
6. Fill your stockings with candy, small toys, and notes with fun activities like movies to watch, crafts to do or special places you will go each day.

Note: If you don’t have the time to make your own this year, there are lots of cute felt calendars out there, or you can just buy the mini stocking part and go from there to save a little time.

More Holiday Crafts to Try
Holiday Gift DIYS
[ad_2]
Source link
